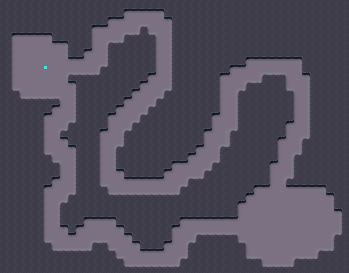
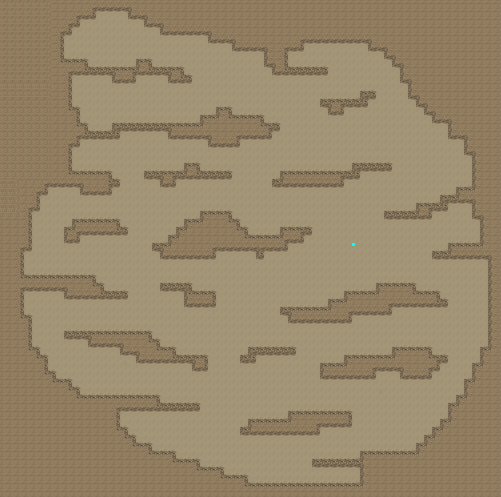
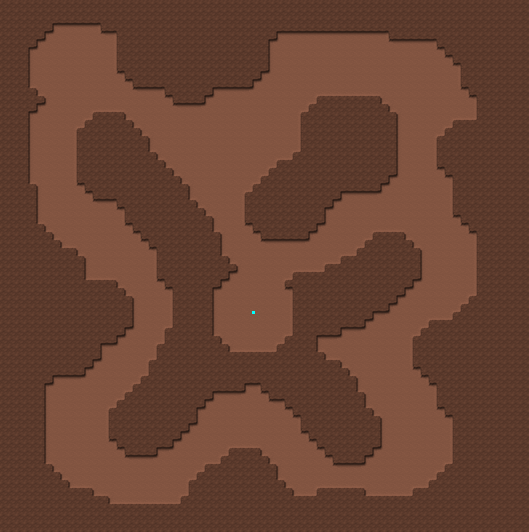
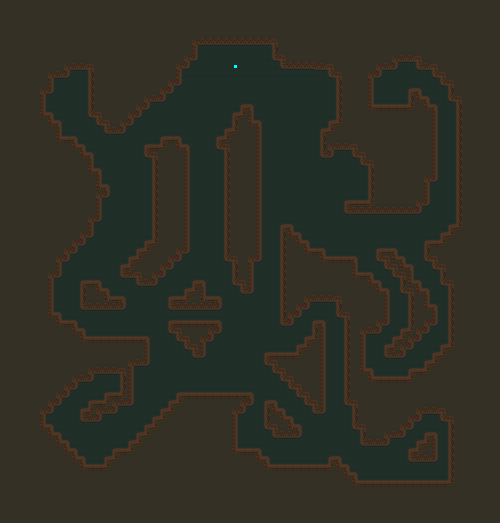
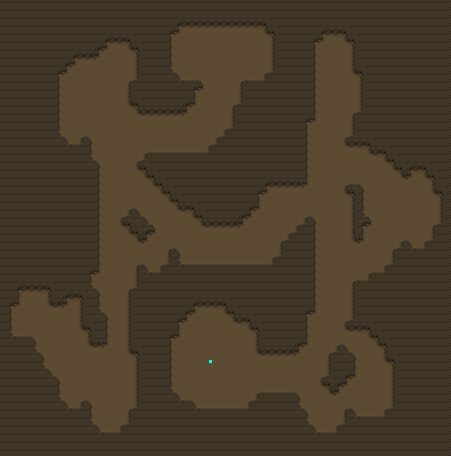
Tifi wrote:1. The Winding Road

The usual spot for setting up is at (1) as theres plenty of room for turrets and the winding passages provide a small measure of distraction as the solar fires away - be warned though that unless you have turrets at the entrance any invaders will have time to group as the solar won't start firing until they enter one of the passages.
Occaisionally you'll see domes set up at (2), theres not much room for defences here but that means that the passages will probably be crammed full, and the solar can reach the entrance.
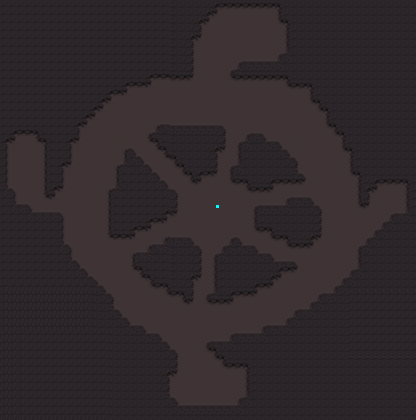
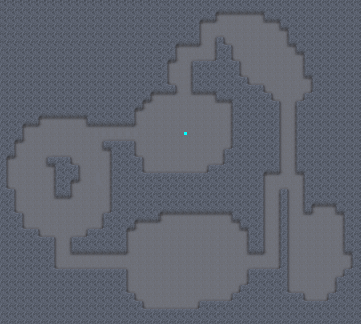
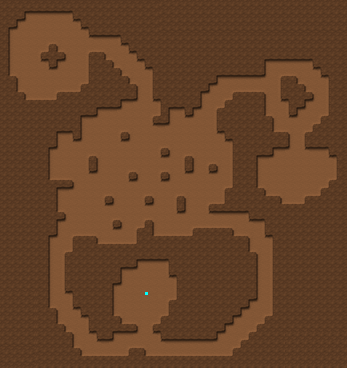
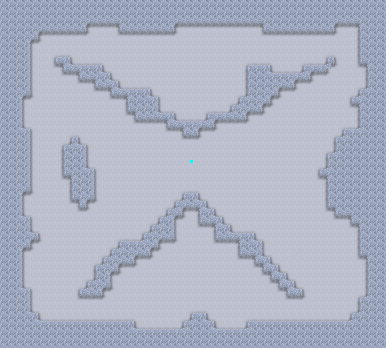
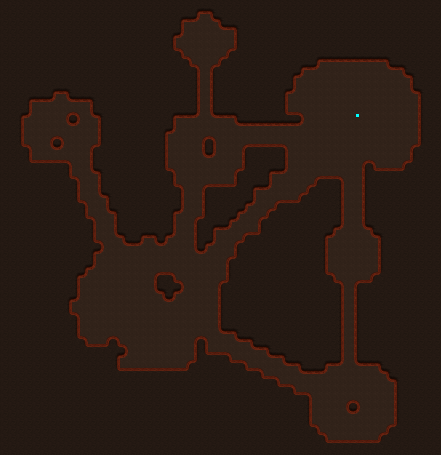
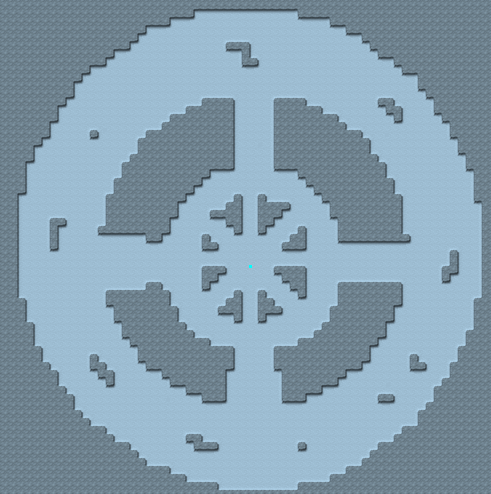
2. The Wheel

The usual spots for setting up are (1) and (3) as theres plenty of room for turrets and theres a nice corner to block straight shots.
(2) has plenty of room but is more-or-less open to the main space, while (4) has little space which means less defence at the dome & more in the 'wheel'.
(5) can be a dangerous spot to inhabit, as it requires the dome to be utterly surrounded but gives the landing an instant blast of solar cover.
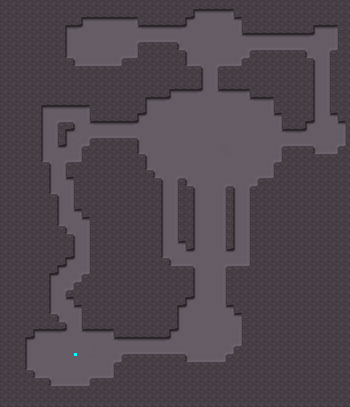
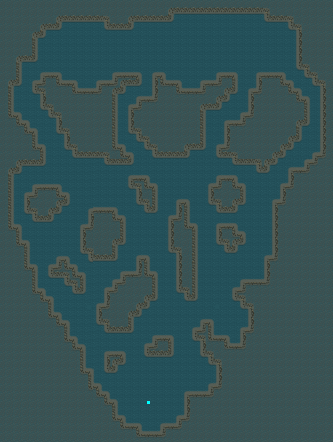
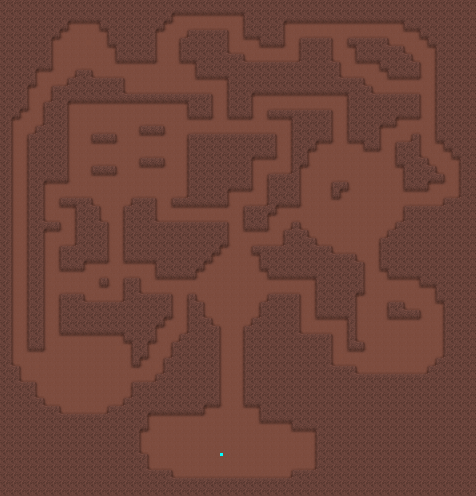
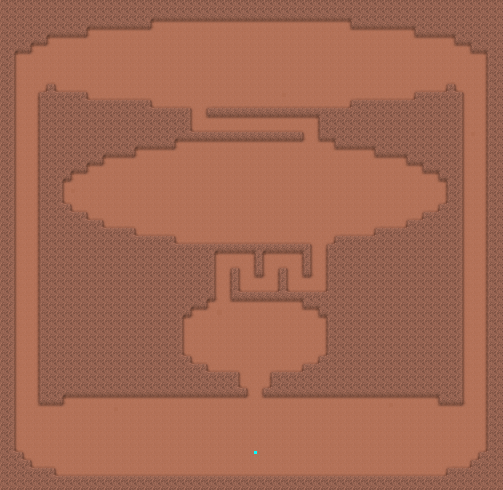
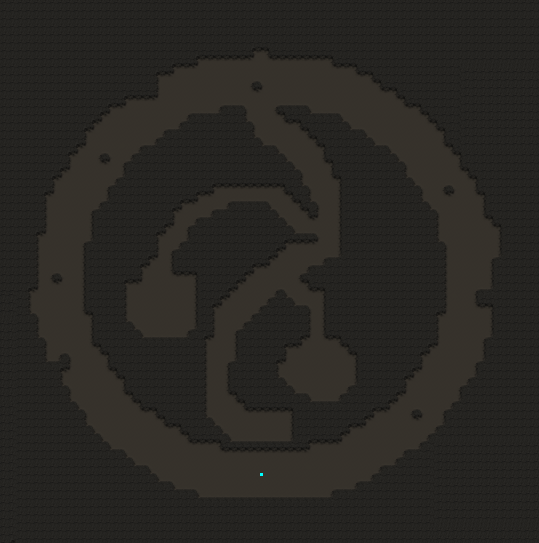
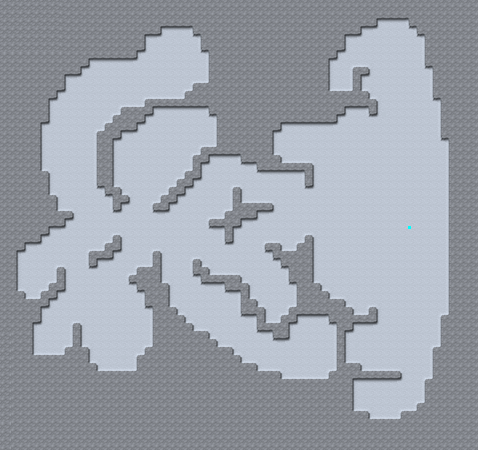
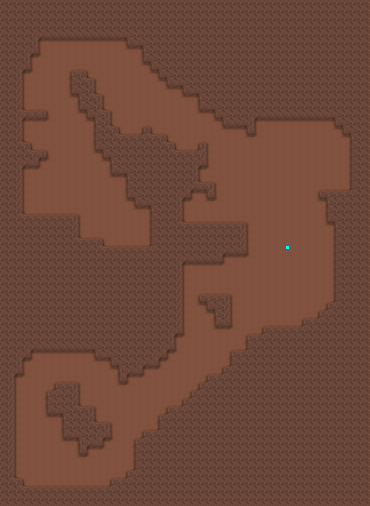
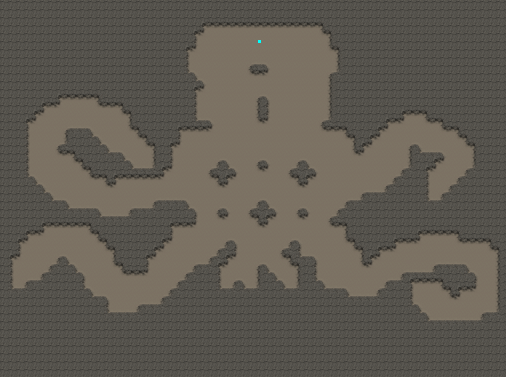
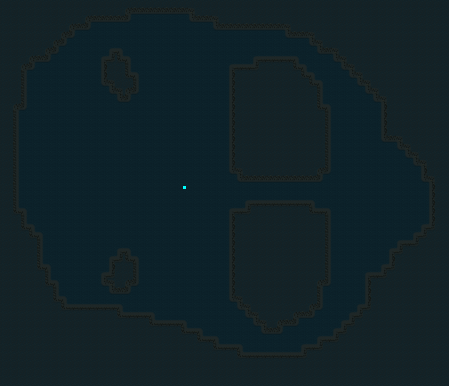
3. The Pierced Heart

Most people seem to set up at (1), and its not a bad choice as theres only one way in & out and theres a nice bottleneck to fill with turrets.
Setting up at (2) can be quite effective for the close in solar cover, but regardless of which area you choose, you WILL be putting lots of turrets down around (2)
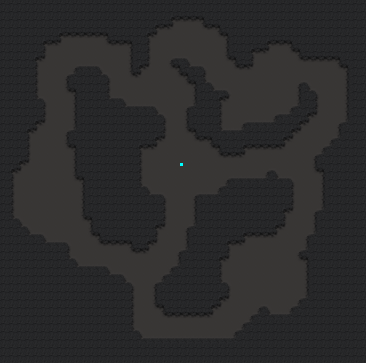
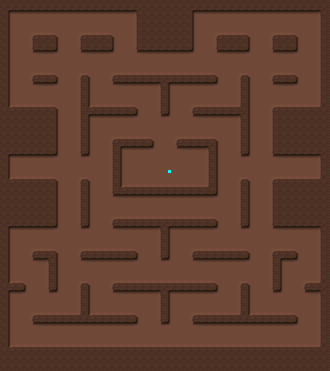
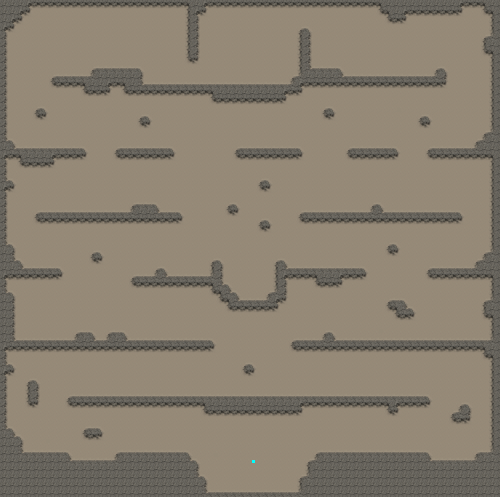
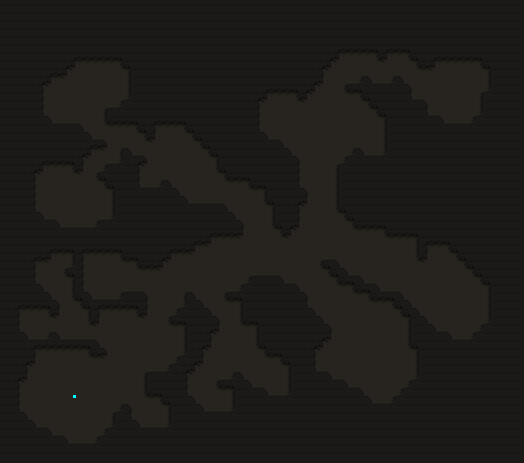
 4. Layers

Three choices for defence here on a convenient sliding scale of space/solar cover.
(1) has the best dome cover but the least room for turrets, while (3) has the weakest dome cover but the most room for turrets.
None of the sites are especially brilliant as all of them can be sniped from round corner passages, so make sure to cram them to bursting to discourage this.
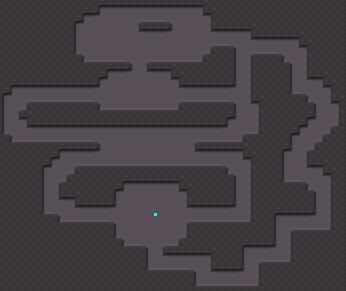
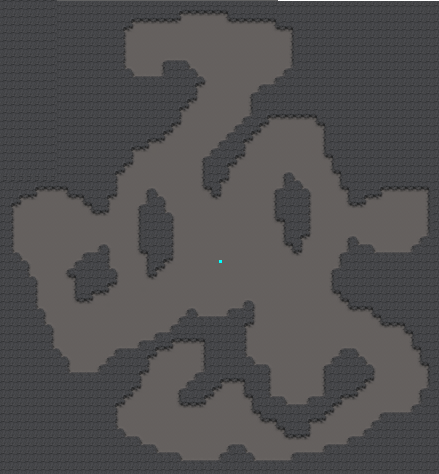
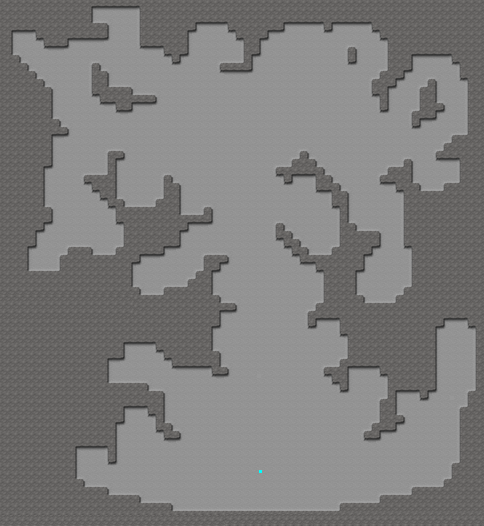
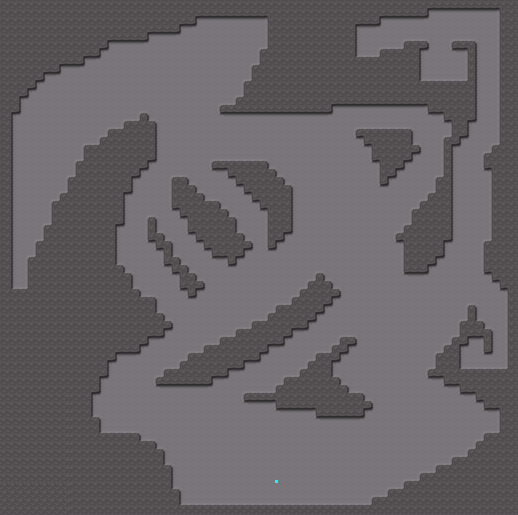
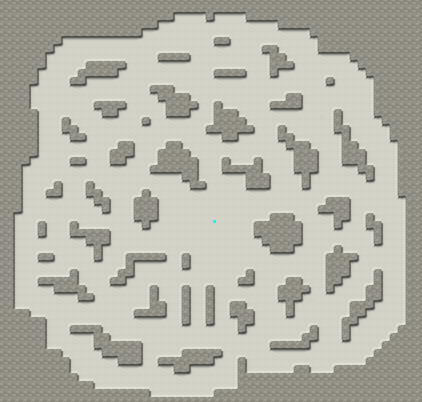
5. 3-way Maze

Usually setting up at (2) or (3) is the safest bet, although theres not much room for turrets they're not that vulnerable either and it leaves you plenty to put round the entrance.
(1) is sometimes seen a colony site but its slightly more inviting to snipers hiding round corners.
(4) and (5) are not often used as they're hard to defend properly and both have passages which can act as missile 'funnels'.
6. Chambers

People tent to go for (1) as its the furthest away from the entrance and has the most passages to hide behind, only problem with that is the mediocre solar cover you get.
(4) is much more practical as all the defences can be concentrated around the landing and givess any invaders an instant solar blast.
(2) and (3) are hardly ever used due to the vulnerability to snipers and tunnel hiders.
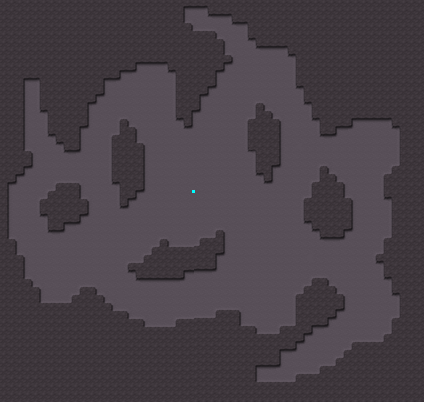
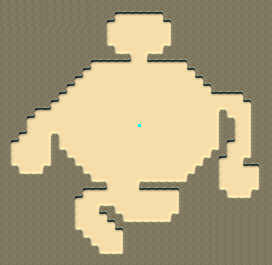
7. Smiley!

Most poeple set up at (1) as it gives pretty good cover and you get a nice passage to litter with obstacles, although you won't have much left for landing defences.
If you can get enough turretss together to fully defend it straight away (3) is a pretty solid choice, but is something of an 'all or nothing' proposition.
(2) is the compromise position, with no special weakness but no strengths either.
8. Curvy Passages

(1) is probably the most favoured spot as it gives enough room for a decent amount of turrets while giving okay solar cover.
Some people like to cram a dome into (2) which can work quite well as it leaves you plenty of spare turrets to block up the landing, wheras the ring at (3) is not used all that often as the other two sites do everything better.
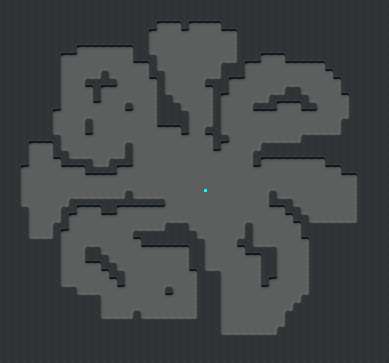
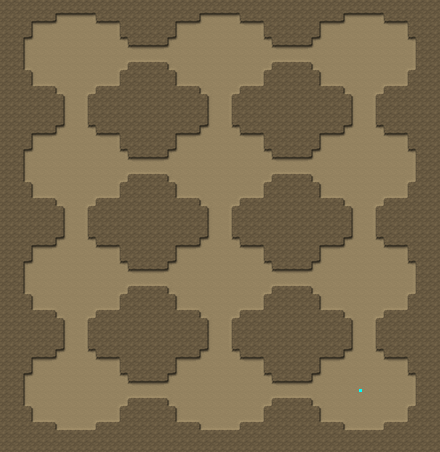
9. Cloverleaf

The usual spot for this layout is (1) as it gives excellent coverage for the solar and has lots of room for turrets.
(2) is also often used as it can provide a much deeper (although less intense) level of defence.
10. More Chambers

The usual spots here are (1) & (2) for the solar cover, but all four locations are fairly average.
Take your pick.
11. Peace Maze

Both (1) & (2) give decent landing cover and plenty of room for turrets, although (1) can cover the far right of the landing zone whilst (2) can't.
Sometimes you see a dome suffed into the passage at (3), which although quite vulnerable can also be quite effective.
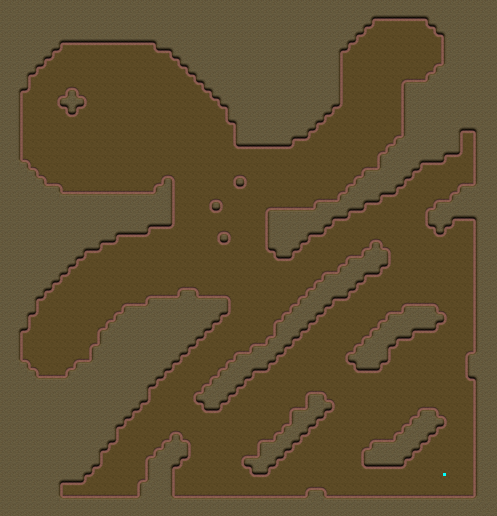
12. Plenty of Room

Depending on who you ask, this is the best or the worst layout to defend.
(2) & (3) give you a nice little wall to hide behind, (2) has better cover but the straighter wall is more vulnerable to sliders.
(1) gives you instant solar cover, but requires you totally surrouns your dome with turrets and blend it into the landing defences which can be very effective when finished.
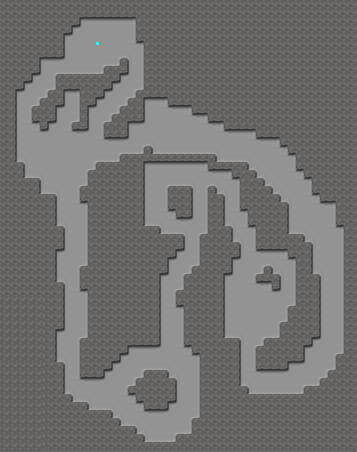
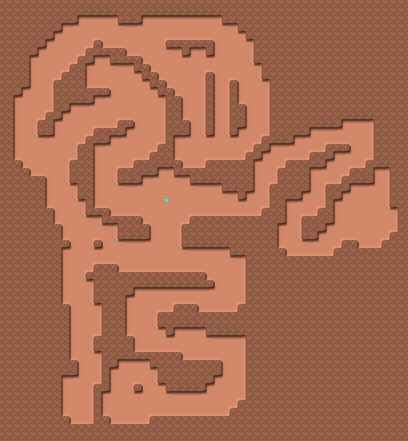
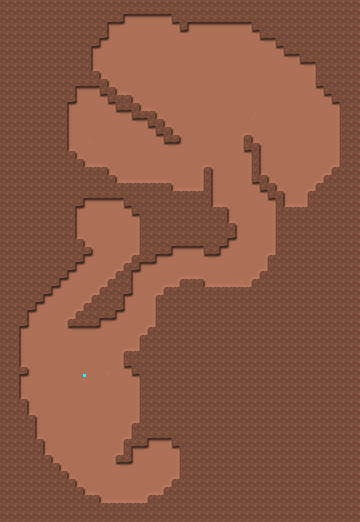
13. Vulture Head

Setting up at (1) is probably the safest bet as it gives good cover and a nice long bottleneck to crap up with turrets.
(2) is also often used but can be quite vulnerable to people hiding around the lump of rock in front of it.
If you plan on building your dome into the main block of your defences (3) is the place to be.
(4) & (5) are not often used anymore as the closed in passageways can block a lot of the defensive fire.
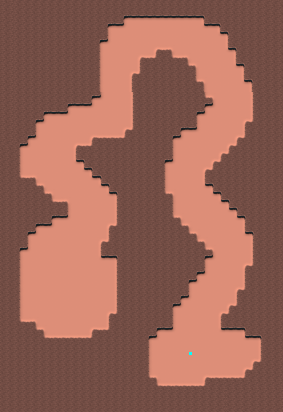
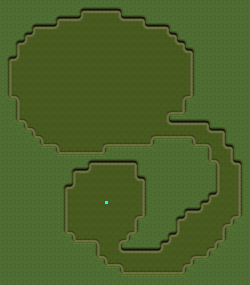
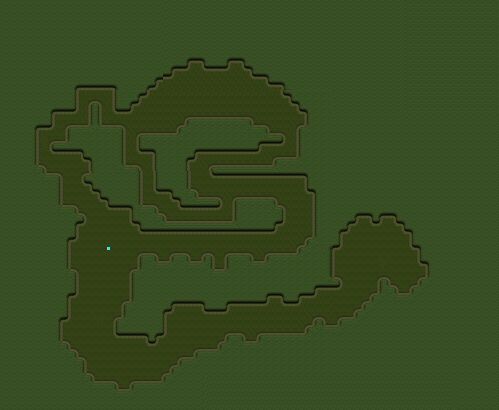
14. The Worm

Not a lot of choice here.
(1) is the usual spot as its fairly easy to defend, while (2) is just asking for invasion unless you can throw down a full set of turrets straight away.
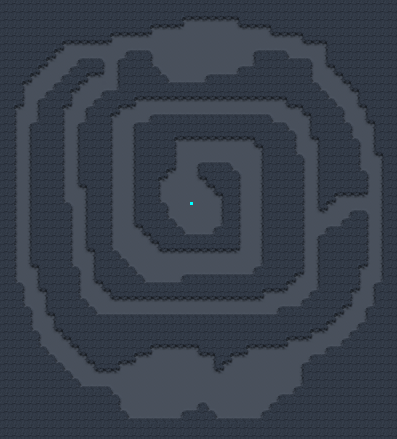
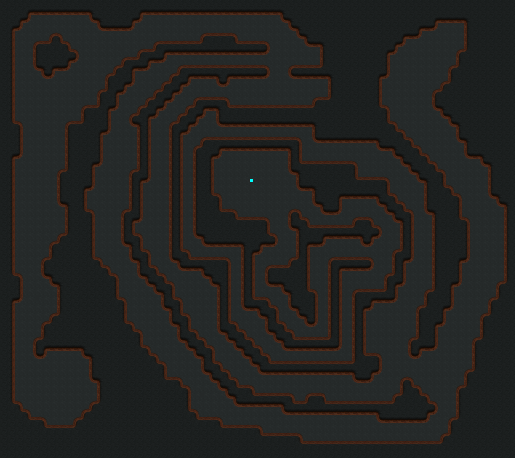
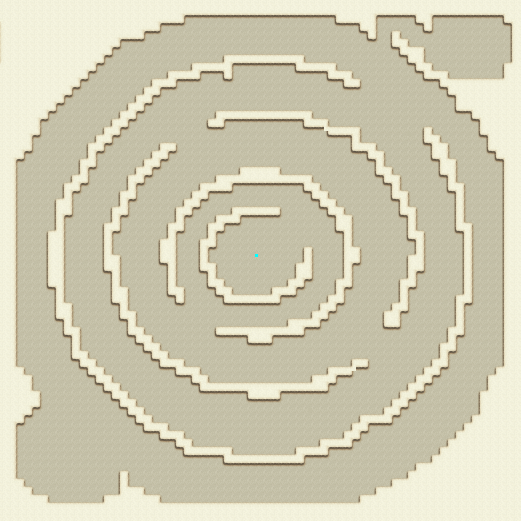
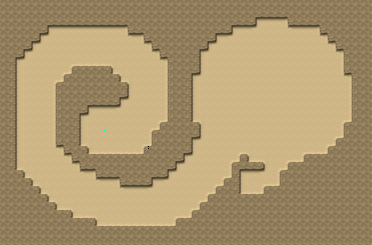
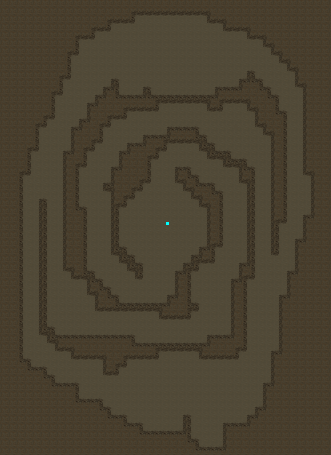
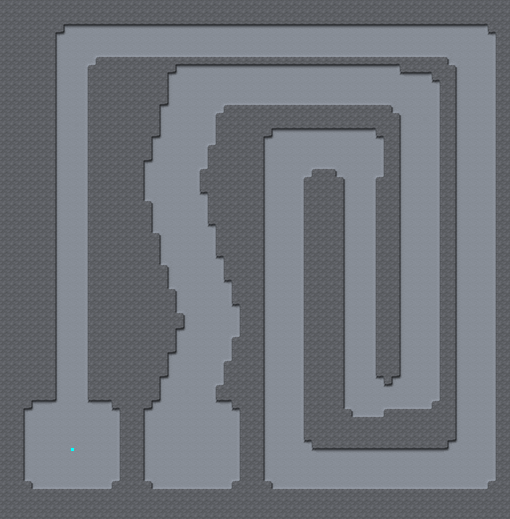
15. The Spiral Maze

Most people go for either (1) or (2) as they both give a decent amount of space for turrets and both make people go round the annoying twirly passages to get to you.
Occaisionally (3) can be used, and can be surprisingly effective as all the defences can be concentrated in the passageway in front of the dome.
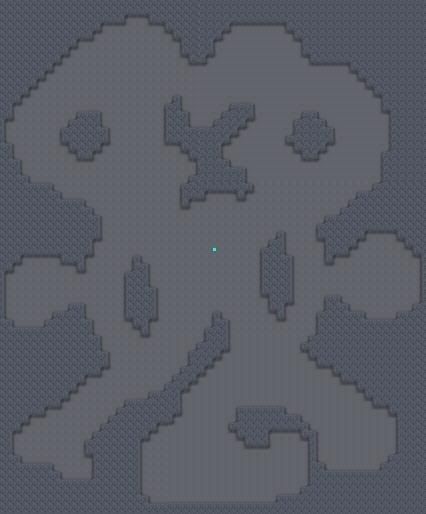
16. Headphones

Pretty much everyone sets up at (1) or somewhere therabouts as it gives good coverage and plenty of room for turrets.
(2) can also be used as you can concentrate all the defences in front of the dome.
You can't really go wrong with this one.
17. Loops

This can be one of the most annoying layouts to invade, especially if the dome is at (1) or (2) as both give excellent solar cover and plenty of room for turrets.
(3) is a slightly 'safer' position and still has pretty good cover, but the free space is limited, whereas (4) gives plenty of room but mediocre cover.
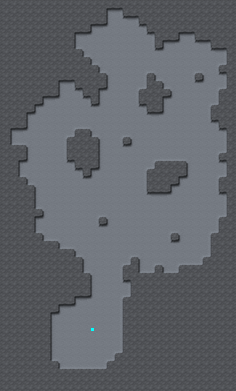
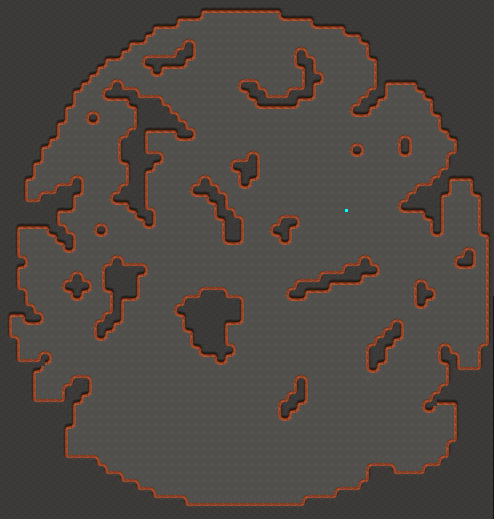
18. Islands

Not much choice here, theres only 3 places worth planting a dome and they all offer pretty much the same level of defence.
All you need to worry about is clogging up as many of the passages as possible and make sure your dome is 100% surrounded by turrets.
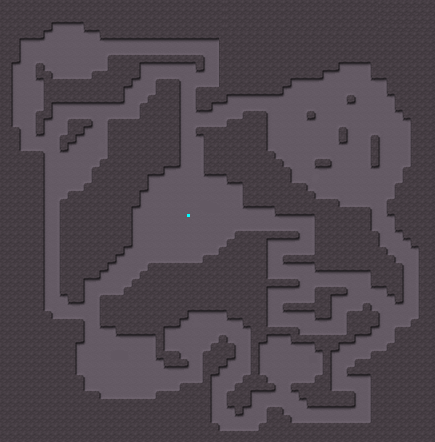
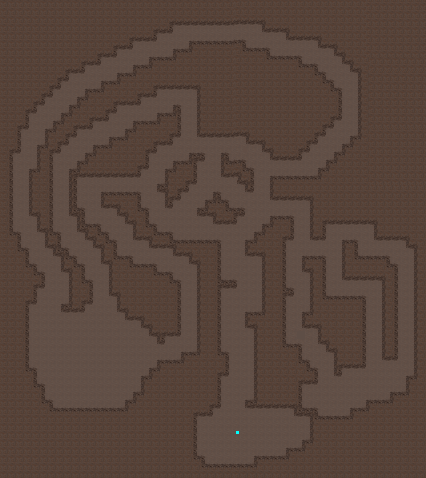
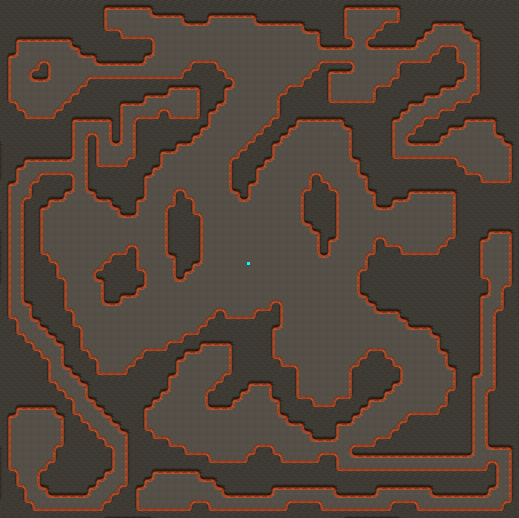
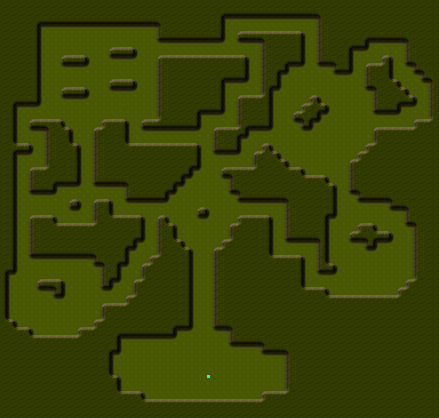
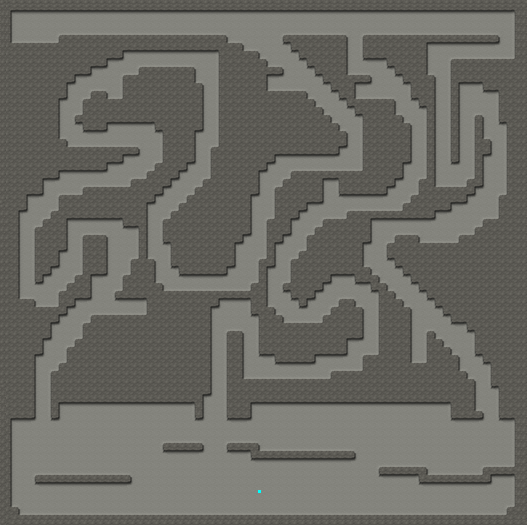
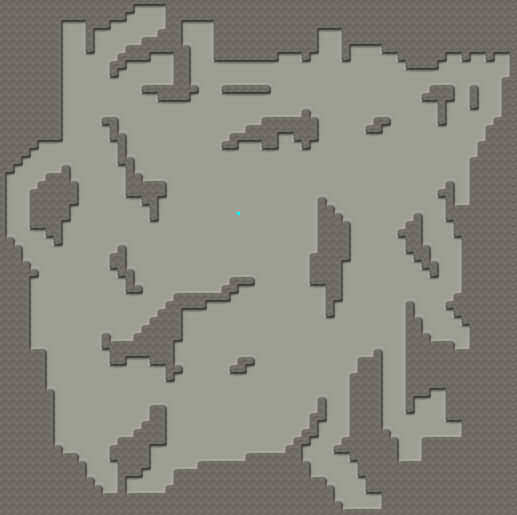
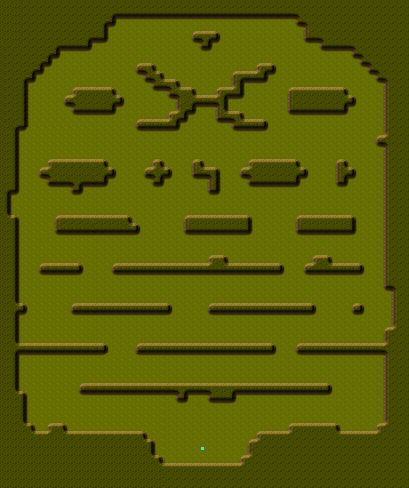
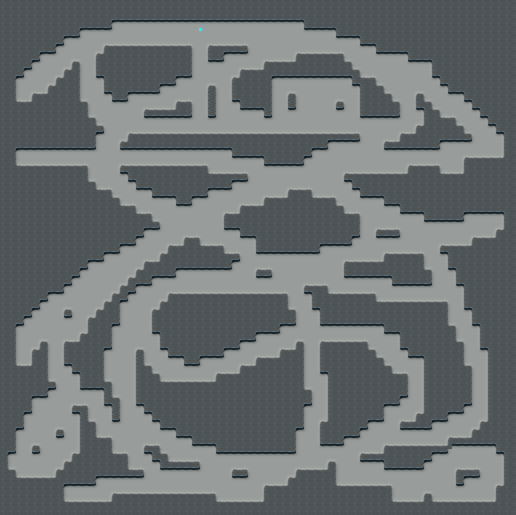
19. Maze of Bigness

If you were dissapointed by the last layout, theres choices a-plenty here.
(1), (2), (8 ) and (12) are your close in maximum cover spots, with (2) being the closest and can be built into the landing ring.
(4), (5), (6), (7), (9) and (10) are the defensive areas with lots of hard to clear passages to hide behind (which incedently are quite hard to get missiles down...)
(11) is one of the commonest places to set up on this map, but also the worst as it is very vulnerable to sniping from behind the little ledge at the bottom.
On the whole (8 ) is probably the safest bet, unless you can land at (2) and drop a full set of turrets ASAP.
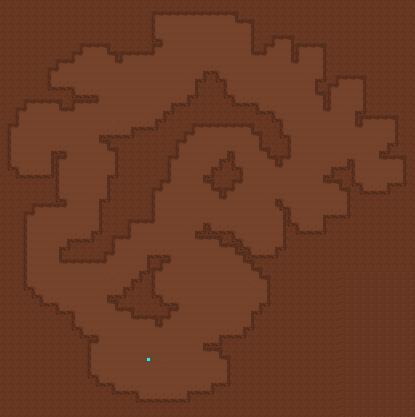
20. Telltale Heart

Just about everyone build thier colony at (1) on this map, & i can't for the life of me think why.....
Sure it has lots of room, but has pretty bad solar cover & invaders can hide from turret fire in the passages.
(2) is a much better place, with a nice clump of rock to hide the dome behind it only takes a few turrets to discourage the 'casual' invader, whilst (4) pretty much requires a full set of turrets.
You can fit a dome at (3) but don't. Ever....
Its very close to the landing, so close in fact you can't fit any turrets inbetween the dome & the invader. This is bad.
21. Superwide

This layout demands a full set of defences as quickly as you can manage, as the landing area is utterly huge.
However, this seeming weakness can actually be a surprising strength as sometimes your would-be invader will land quite far away from the warp point, and if you have turrets all accross the gap at (3) then things could well become amusing (for the defender anyway).
(1) (2) & (3) are the best places due to the solar cover, with (3) probably being the best although the hardest to defend you can concentrate all your defences in the immediate area.
Pretty much forget (4) as its too far out for the solar to be useful near the landing.
22. Diamond Passages

(1) and (2) are the most commonly used spots as they give good coverage and have a decent amount of room for turrets.
(3) is okay but a bit far away from the landing, whilst (4) is both far away and has a limited amount of space. Forget it.
(5) can be pretty good as it has the best coverage, its the only site that can cover the whole landing with solar, the others can't quite reach thier respective opposite sides
And you can cram all your turrets in front of the dome making for a pretty lengthy invasion.
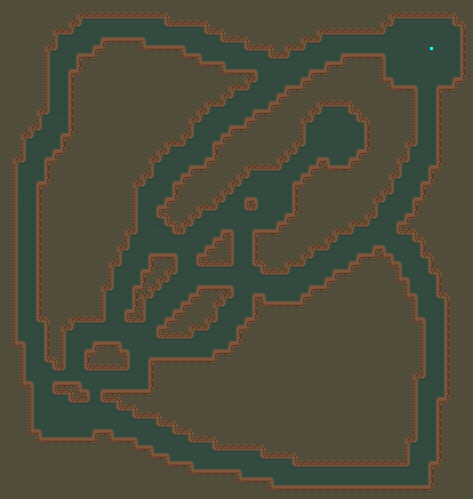
23. Long Island

If you can manage it, try to get your dome with all its turrets at (1) as all the other sites are vulnerable to long-range sniping (especially (2) and (4))
24. Beehive

Go for (1) or (2) here, as both give good coverage and you can build the dome into the defences.
A lot of people still use (3) but its very vulnerable to sniping as that stepped wall will shield attackers from most turret fire.
25. Antennae

None of the positions here are especially great, most people tend to go for (2) and cram all the tunnels to bursting with turrets, and its not really a bad choice as (1) has poor solar cover and both (1) & (3) have little islands to hide behind.
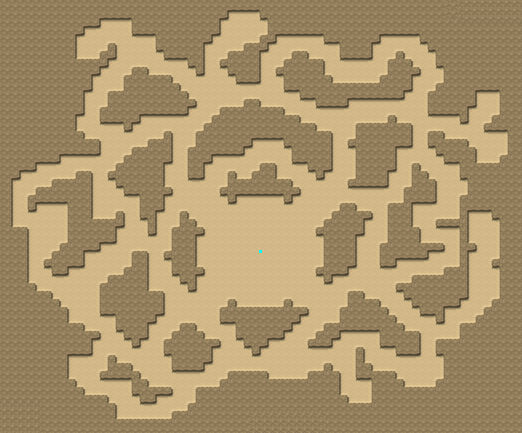
26. Diamond Maze

The usual places to set up are (2) (3) and (4), all give plenty of room for turrets and passages to hid behind as well as halfway decent solar cover.
(5) isn't very good as the islands can block most of the turret fire making invasion that much easier, while (6) is both small and too far away from the landing.
(1) is a nice place to set up, especially near the top of the diamond as it gives good solar cover and allows you to concentrate turrets in one area.
27. Three Way

Its hard to go wrong with this map.
All areas give a decent amount of space and the overall small size means solar cover is good everywhere.
(1) offers arguably the best solar cover of any layout and plenty of room to clog up with turrets.
You can even set up your dome in one of the wide passages if you really want, but i'd go for one of the wider spaces for maximum turret annoyance.
28. Coral Island

Theres plenty of good spots here, as well as plenty of not so good ones...
The best are (1)(2)(3) & (4) as they're all fairly close to landing and so give good cover, although (4) is somewhat cramped.
(6)(7) & (9) are thouroughly average although they have plenty of room for turrets.
I seriously would'nt bother with (5) or (8 ) as they can both be sniped very easily by anyone with even a fraction of patience from behind those ledges.


